Come learn the art of 3D computer generated art and animation. This blog deals with the lessons learned and the art created by Robert G. Male using DazStudio from Daz3D.
Also covered are the ancillary software, tools, techniques, and processes needed both before and after rending in the 3D software.
R.M.T.P. Co. is a
company dedicated to quality
Web products without all of
the unnecessary hype. Our
products speak for themselves. Down to earth, easy,
usable, these are the principles
we believe in.
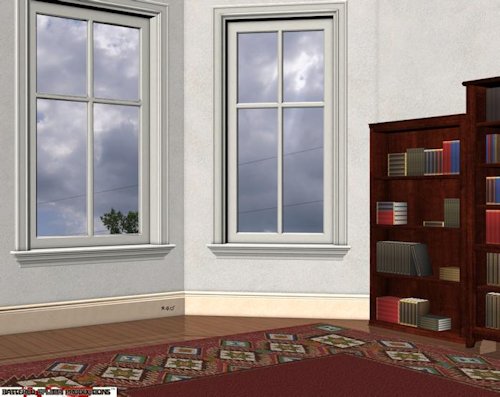
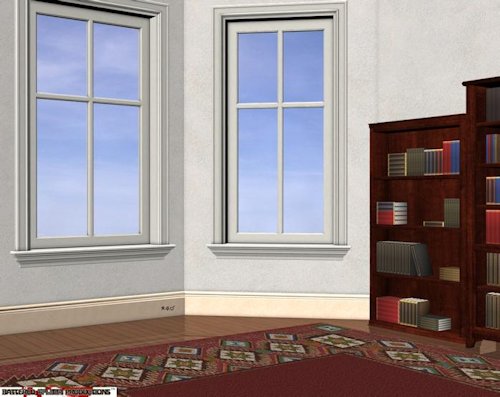
I often find myself trying to figure what to put outside of windows, behind trees and buildings, and just generally trying to complete scenes without putting everything against a wall. I have a couple skydomes, and there is the background system I bought that has a few sky options. All in all they seem pretty limited once you've rendered a lot of scenes with them and some are decidedly geared toward sunset and the early evening.
To combat this I've been hitting up free texture sites. They tend to focus on the same later daylight hours too. Or they are heavily overcast, not always the most interesting cloud cover, or too interesting a scene that don't want to repeat it in other images. This leaves it up to me to go out and get some better sky photos. It's going to take quite a while to do it. The weather isn't very cooperative. It's either too overcast or too clear. The sky below is not too bad. I'd like some more isolated clouds and wispier ones as well.
The other issue to contend with it having only skies and nothing closer to the ground. That still doesn't cover that most views out of house windows and the like also include neighbour's houses, or at least their roofs. That runs into trouble with permissions and the like.
Here's how I take the photos and put them into Daz. Rather than mess around with dimension issues just take your photo and change the canvas size to make the picture square. Use a bright simple colour--I use purple--not present in the edges of the scene as the background colour for the new parts added to the image to square it up. Then you use the square image as the diffuse image on a plane primitive. Increase the size of the plane and put it outside of the window. It's a juggling act between the size of the plane and how far away from the window you put it. The bright non-picture portions of the surface tell where you can place the plane within your windows. Two more surface dials have to be altered. Turn Glossiness to 100% intensity and Specular intensity to 0% so that lights do not reflect off of the plane. I change the Ambient colour to white and the ambient intensity to 20% to make the sky more vibrant in the render. This may vary depending on your lighting.