Come learn the art of 3D computer generated art and animation. This blog deals with the lessons learned and the art created by Robert G. Male using DazStudio from Daz3D.
Also covered are the ancillary software, tools, techniques, and processes needed both before and after rending in the 3D software.
R.M.T.P. Co. is a
company dedicated to quality
Web products without all of
the unnecessary hype. Our
products speak for themselves. Down to earth, easy,
usable, these are the principles
we believe in.
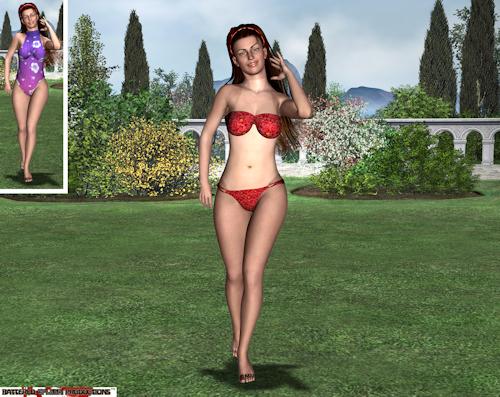
There are a few topics that I would like to cover in the short term, but I thought it best to talk about a little experiment I completed yesterday. It's summertime and with that comes a lot of outdoors activity. That of course leads to tans. Tans then mean tan lines when people change the shape of their clothes.
The first thing that I did was go into the Surfaces of my figure and change the Ambient Color and the accompanying strength. The new colour is darker with a touch more red hue. I took the lightness of the colour down to about 78% of what it was. I doubled the percent strength of that ambient colour. Despite being a darker, redder, colour this strength increase adds a certain glowing quality. Once I was satisfied with that I then went and adjusted the Diffuse strength, and only the strength. I dropped it from 90 to 65%. I think the combination of these two changes best represents a tan. You milage may vary wildly from character map to character map and even under different lighting schemes. For sunburn put in more red at a stronger percent, and don't adjust the diffuse down as much, though you may want to try other methods for bad burns and really red skin.
The next step is to pick out two sets of clothing. The first is worn when out in the sun and determines what parts of the body are tanned. The second is worn after and shows the tan lines on the figure. The easiest way to get the clothes cut out of the more covered image is to change their Surfaces to black in the Diffuse and Ambient, and turn off the Specular (make it 0%). Once you have done that then you overlay the now tanned parts over the untanned parts. The edges will need some smoothing out and beware of not cutting off or obscuring parts of the less covering set of clothes. This can get a bit tricky where long hair is concerned as well.
You can also adjust the amount of tan by layering the tanned version over the untanned version and changing the opacity of the tanned layer. I did this with two layers in my image to darken the legs more than the upper body. This was due to the lighting in the scene, particularly the way it falls down on the character. In fact I affected the brightness of the legs to make them darker than even the rendered surfaces provided.