Come learn the art of 3D computer generated art and animation. This blog deals with the lessons learned and the art created by Robert G. Male using DazStudio from Daz3D.
Also covered are the ancillary software, tools, techniques, and processes needed both before and after rending in the 3D software.
R.M.T.P. Co. is a
company dedicated to quality
Web products without all of
the unnecessary hype. Our
products speak for themselves. Down to earth, easy,
usable, these are the principles
we believe in.
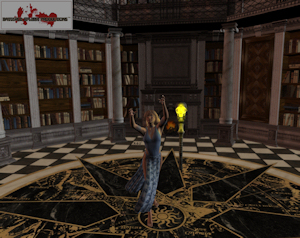
One control in DazStudio for focus that I did not get into last week is the Focal Length. Focal Length is just like the same control on a physical camera. Daz sets the default at 65, which at an educated guess equates to 65 mm for a camera lens. If you have the Depth of Field turned to On and change the Focal Length the resulting render appears closer or further away from the viewer. A larger number, like 100 in the render on the left below, you see less of the scene and the background is out of focus. A smaller number, like 35 in the render on the right below, you see more of the scene behind the figure and there is much less blur. When you change the Focal Length you need to decide if you want to leave it as is or if you then want to adjust the F/Stop as discussed last week. If this all isn't clear, depth of field is about what is clear and sharp, and what isn't--I find the idea gets lost easily even as I write about it.
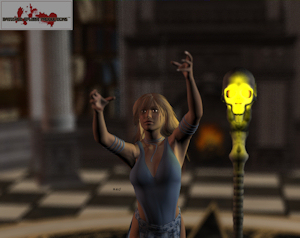
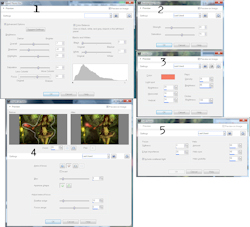
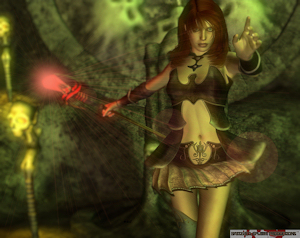
I want to leave that all behind for the time being and talk about a new picture that I put together using some postproduction techniques to greatly improve the render. Amongst the processes I applied is the PaintShop Photo Pro X3 version of after-the-fact Depth of Field. My favourite new process in X3 (over my old version 6) is the Smart Photo Fix. As you can see in the control window marked 1, it has three levels of brightness control, Saturation and Focus, and Black and White balance. It gives me what I consider a great amount of control to really make my renders pop. The window marked 2 adds backlighting, which means it fakes lights that aren't there, or are at least influenced by the bright spots in the scene, which happen to be the lights in the render.
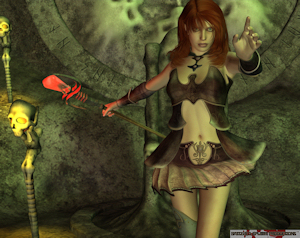
I also immensely enjoy that sunburst effect with the light rays and heliographing circles of light in control 3. The Depth of Field dialogue box in 4 is what I've talked about previously and you can see I selected the figure and wand as being the clear focused part of the picture. The last one marked 5 is Soft Focus which I understand least, except that it makes some parts softer than others and adds a halo or blur effect to some of the lighter areas. I ran all of these in the order of the numbers to achieve the final picture on the right below with one small addition. Most of the sunburst light rays are completely in focus so I manually softened them with a brush so as not blur out too much of anything behind them. That left image is the untouched render. Quite the difference between them, eh?