Come learn the art of 3D computer generated art and animation. This blog deals with the lessons learned and the art created by Robert G. Male using DazStudio from Daz3D.
Also covered are the ancillary software, tools, techniques, and processes needed both before and after rending in the 3D software.
R.M.T.P. Co. is a
company dedicated to quality
Web products without all of
the unnecessary hype. Our
products speak for themselves. Down to earth, easy,
usable, these are the principles
we believe in.
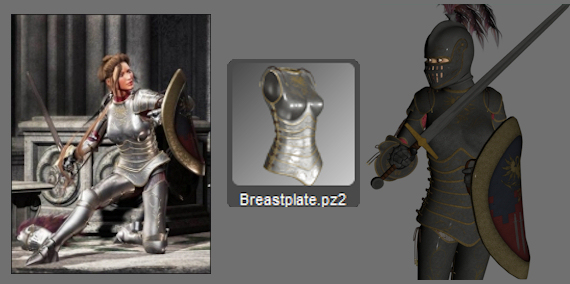
I bought some full suits of armour for Victoria 4 and Michael 4. Both have nice looking sample images in the read me for each. Below I have placed those read me images on the left, the badge for the pose in the middle and a small render I made using this pose on the armour. I did it for Michael and then for Victoria. Look at the significant difference between the armour for the two figures. A different vendor created each armour set so it isn't entirely fair to compare them to each other. However, I think it is entirely fair to compare the sales images to the actual render a buyer might make. The armour for Victoria looks nothing like the samples or even the example given right on the map pose loader.
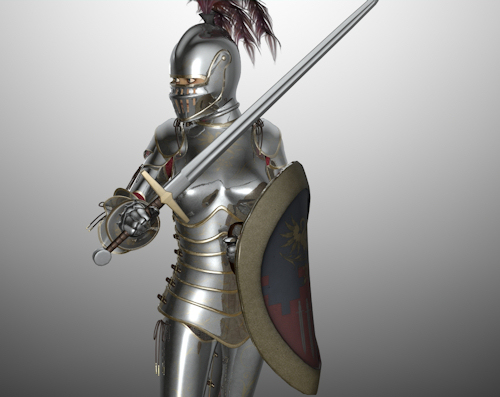
The armour for Michael includes Displacement maps, a Reflection Color map, and a Reflection Strength map. The armour for Victoria does not include these maps, and you cannot swap them in from the Michael set. So what are you to do to make the Victoria armour look like metal? It takes more than just giving it a solid reflection colour and cranking up the reflection strength. The best way to do it is the most intrusive and unlikely to be of any use in a real scene. I put a massive white sphere primitive around Victoria in the armour, big enough to encompass the camera as well. I adjusted the Glossiness to 80 or 90% depending on the section of armour (some reflect and gloss better than others). I set the Reflection Strength to 80 or 90% depending as well. The Reflection Colour is white. The white reflection without the sphere or the sphere with a darker reflection gives mixed results. Using two plane primitives makes for odd results, but perhaps not as odd as a single plane behind the camera like a studio photographer might use. The sphere results in the image below.
Changing the colour of the sphere really impacts on the brightness as well as giving the armour a false looking colour compared to the white. Changing the colour of the light gives better results but it is apparent that the light is a different colour in its reaction to the bright spots of the reflected light. Changing the Reflection Color changes the colour of the armour but not the reflected light. This change to the armour can be quite striking with certain colours and is best when the colour is very pale. Some experimentation might be required for each image individually including mixing some of these options. It still leaves the question of how to incorporate that sphere and a background. The answer is likely limited to postproduction work involving cutting out the armoured figure from the sphere render and pasting it into the normal scene. Alternately it might be better to try and duplicate the extra maps from the Michael armour using the existing Victoria maps.